This morning I have the unfortunate task of replacing the top screen on a DSlite. This must be at the top of the list for most annoying job.
After struggling for what seemed like a few hours, to feed the ribbon cable through the hinge housing on the bottom screen, I had an idea.
A small amount of kaptop tape, to extend the ribbon cable, allowed me to feed the cable through and pull it with my tweezers, without damaging the connections.
It’s a small tip, but the amount of time I could have saved, I thought it deserved a new blog post.
Here’s a photo to illustrate what I’m writing about.
I hope this little tip helps someone as much as it helped me.
Don’t forget to subscribe to my youtube channel for more console fixes.
I had the silly idea of removing all the components from my working Gameboy Pocket, taking some high resolution scans of the naked board, then putting everything back on, to see if it still works.
There will be a video on my Youtube channel when it is all finished but in the meantime here are the scans of the bare motherboard.
If you want to see if the poor GB Pocket gets put back together and survives the ordeal, don’t forget to subscribe to my channel and click the notification bell.
In this video I show you how I fixed up my £9.99 DS lite ebay find. It didn’t take long to indentify the problem and when the new part arrived, it was a relatively easy fix to get it working again.
Identifying a faulty charge port.
Fault finding a broken charge port on any Nintendo DS is fairly simple. After plugging it in, give the power lead a wiggle from side to side to see if the orange light switches on and off as you move the cable.
A visual inspection can also reveal damage with missing or bent pins inside the connector.
Conclusion
While removing the faulty component I found the flux paste much more effective than the brush on (no clean) type. Using the hot air was much quicker than th soldering iron and solder sucker, with the added benefit of being non contact (in theory there is less chance of damaging pads).
The game ports worked after a good clean. So rather than there being a fault, they are just worn, making them a little temperamental at times.
It you have any comments or questions, please leave them on youtube and thank you for watching.
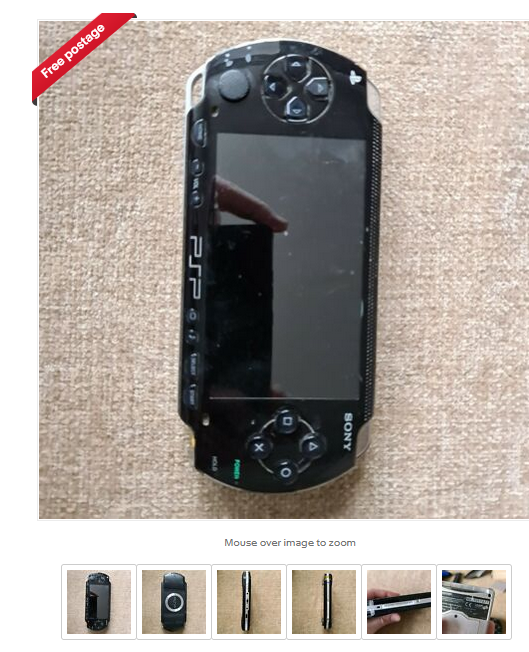
A few days ago while browsing ebay someone had just listed a faulty Sony PSP for the low price of £20. I’m not too interested in PSPs ate this time but looking through the photos of the item, and something caught my eye.
The last photo for the PSP actually showed the back of a Gameboy SP, with the PSP in the background. This gave me a good idea that the very next thing they were going to list was that Gameboy.
The missing Gameboy
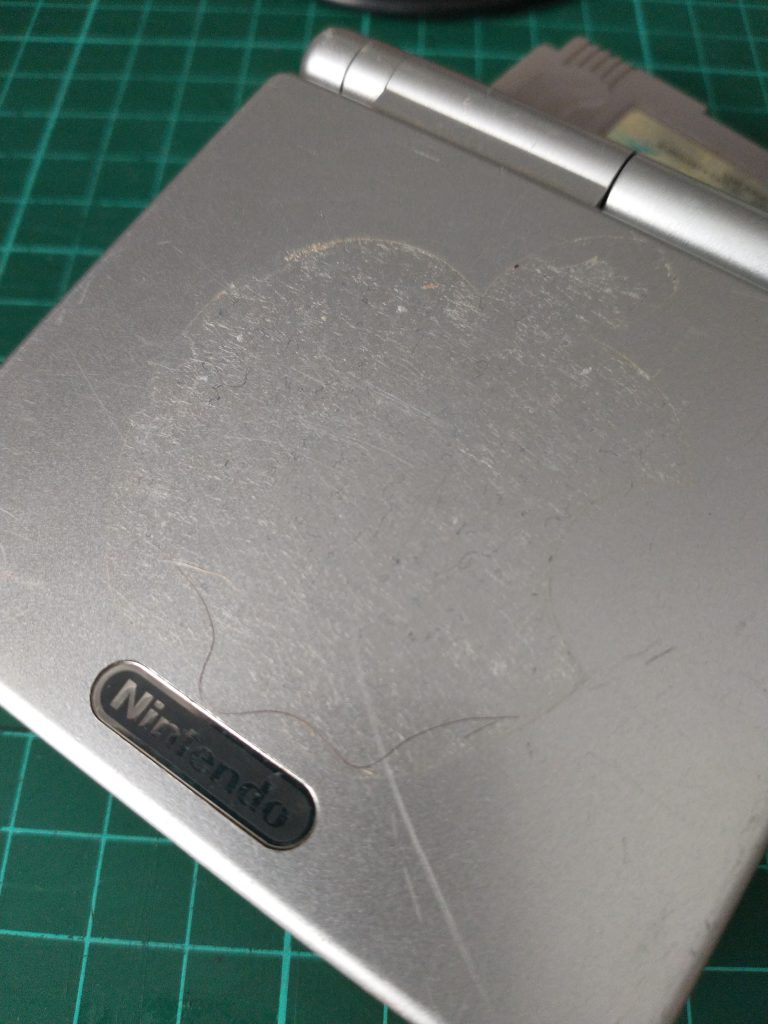
A few minutes later and lots of F5’ing, sure enough they listed a silver GBA SP with a buy it now price. Thankfully my immediate offer was quickly accepted and I am now the new owner of a silver GBA SP.
Good cleaning and free gaming
There was some cleaning to do when it arrived, a previous owner had customised it with an Apple logo sticker on the top of the case which left a lot of glue to remove but the seller did send out a game with it too, which I wasn’t expecting.
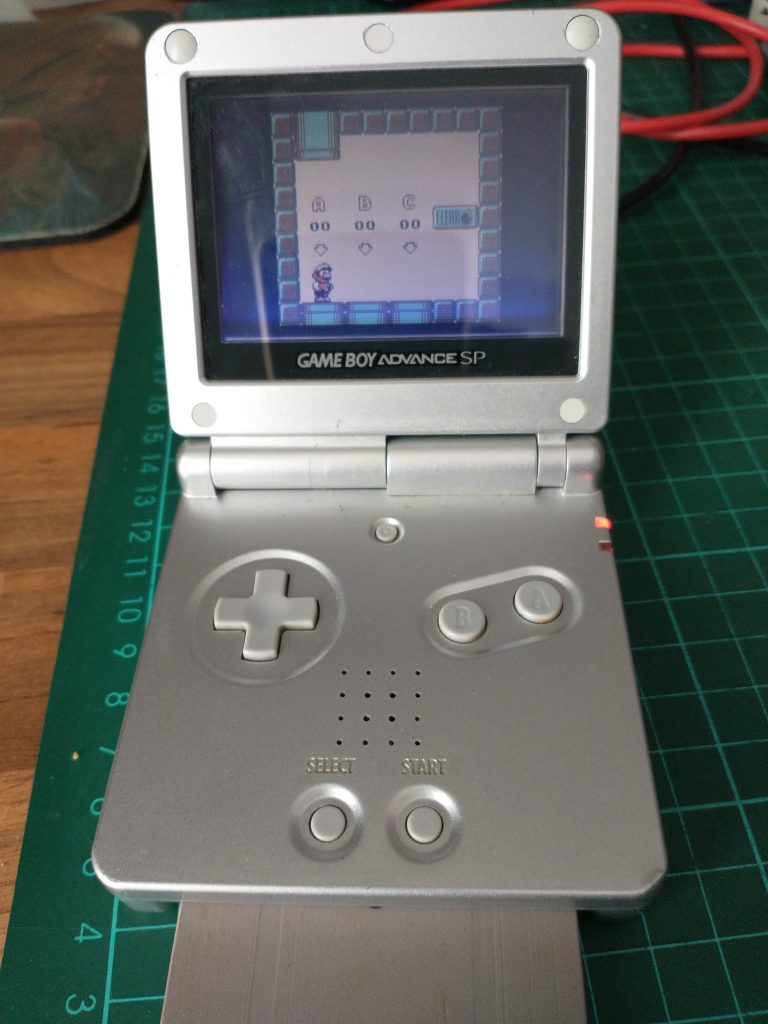
After a good clean with Mr Sheen (don’t use alcohol on plastics), here it is tested and working. Although being sold as faulty, it does power on, play the included game, Super Mario Land 2: 6 Golden Coins and the charging light illuminates when connected to the mains.
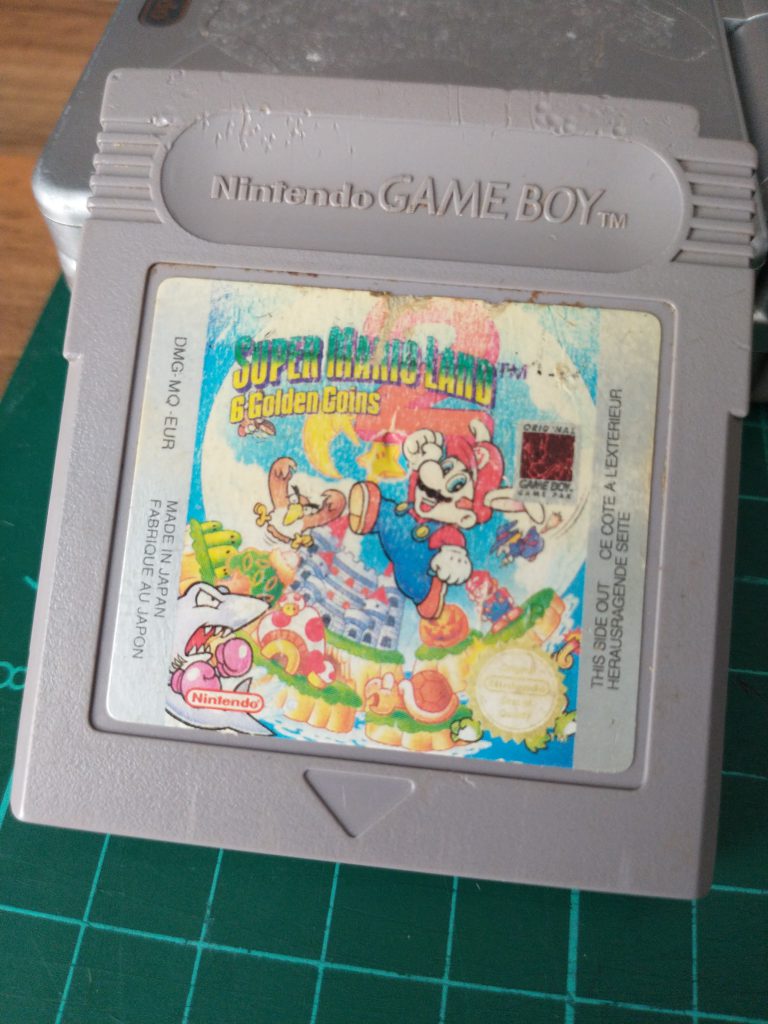
The game cartridge has seen better days, you can tell someone has enjoyed playing this game a lot. It’s not the correct format for the SP but it is my first gameboy game cartridge, which I will be keep for testing gameboys I own in the future.
Happy ebay hunting guys
So I am of course very happy with my purchase. It goes to show it’s worth browsing people’s listing and having a good virtual rummage if you have the time.
It’s going to hard to find a better bargain in the future.
During February 2021 I have been buying and selling a few games consoles, with the goal of making enough profit to buy myself a hot air re-work station and then hopefully an oscilloscope.
Handheld devices are new to me, as I have never owned a Gameboy, DSI or similar, but I know they are still very popular.
So I took a chance and picked up these two Gameboy Advance SP NES edition, the pair were being sold as ‘faulty batteries, won’t turn on’, and I paid £50 for them delivered.
When they arrived, I was pleased to see they were in good condition and the housing was original too. It wasn’t until I paid the money, did I learn there were reproduction ones being sold too.
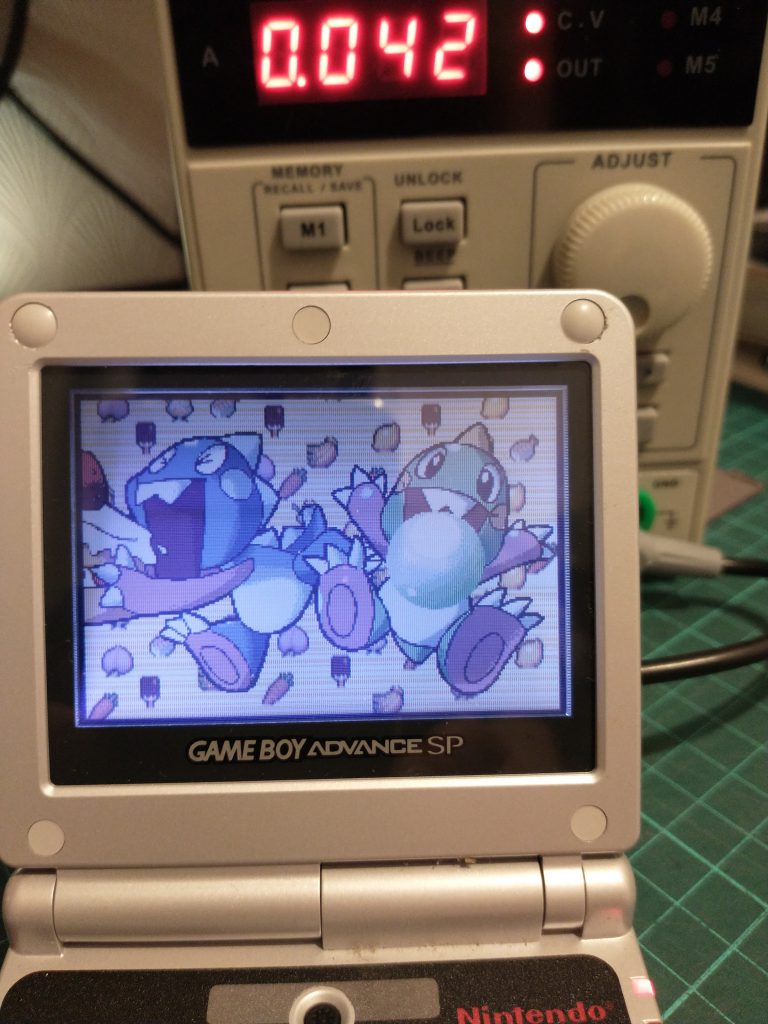
Supplying power through the bench top PSU
My first step was to remove one of the batteries and hook up my bench top PSU to the battery terminals on the GBA, carefully dialling in the correct voltage and amps from information on the battery.
The GBA turned on and was games loaded without any issue. Sound was also working, I will come back to that later.
Battery Charging with the TP4056
Using the TP4056 li-on charging board and an USB volt/amp meter tester, I could see the battery was charging. Both consoles turned on and played games from the charged battery.
Testing the charger
So both Gameboys work with a charged battery, but the charger won’t charge the battery. So I’m beginning to think there is a charge problem inside the GBAs, but it’s unlikely both would suffer the same fate.
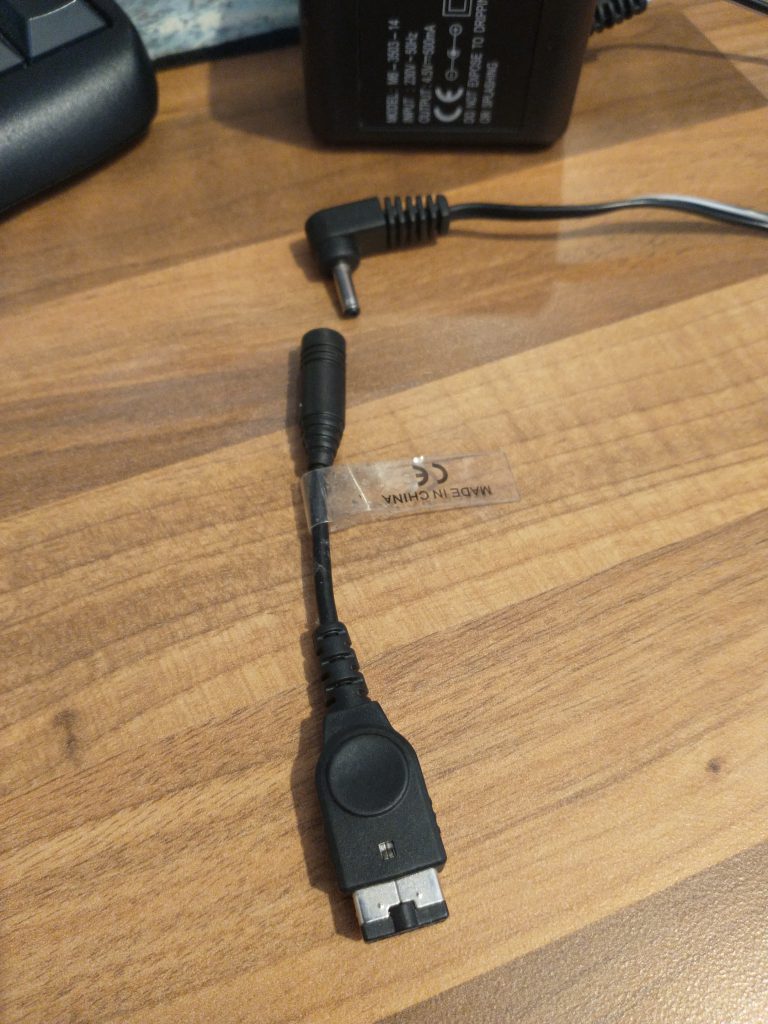
If you know about GBA SPs you might have already figured out what’s wrong with the above photo.
I snipped the jack plu off the charger the ebay seller provided, plugged it back into the above adapter and powered the GBA using my bench top PSU.
The penny dropped
Two things seemd odd. 1. The GBA didn’t take any amps from the bench top PSU (which meant only the battery was providing power). and 2. There was no sound coming from the speaker.
After some research I learnt the adapter in the above photo, is not a power adapter, it’s for headphones. The previous owner had been trying to power both GBAs through the headphone adapter.
Thankfully no harm seems to have been done to the consoles. There is a new charging cable on the way and it seems I have been lucky with these two.
A lot of time could have been saved, if I had a proper charger and not relied on what the seller provided but with the help of the TP4056, USB meter and bench top PSU it all worked out in the end.
I’ll test these properly and sell them on the add to my hot air re-work station fund.